The Growing Importance of Cybersecurity in Today’s Digital Age
Understanding Cybersecurity: What It Is and Why It Matters Cybersecurity refers to the practices and processes designed to safeguard computers,...
At some point during your Windows 10 usage, you’ll find yourself needing to rename files or folders. Whether it’s due to a spelling mistake or because you temporarily named it “asdf”, Microsoft’s OS has several tools to help.
While there are third-party applications like PowerToys that can speed up the process, in most cases the built-in Windows 10 functionality will do just fine. As a result, it’s those we’ll be focusing on today.
Below you’ll find out how to rename a file individually, use the rename command in CMD and PowerShell, and how to batch rename files via File Explorer. Let’s get started:
Though it’s underutilized, you can actually use a shortcut to rename a file. The rename shortcut has remained stable across several Windows versions and is unlikely to change any time soon, but it’s not “Ctrl + R” like you might expect.
After you select the file you want to rename, the rename shortcut to memorise is F2. This will open the text box, at which point you can type whatever you like and click away or press Enter.
For laptop users, however, accessing the F2 key may require pressing Fn and could be slower than the alternatives presented below.
If you struggle to keep shortcuts memorised or don’t have dedicated F keys on your keyboard, the task explorer ribbon is the next most intuitive option to rename files.
Select the file you want to rename in File Explorer, making sure you’re on the “Home” tab of the ribbon. Then, simply click “Rename”.
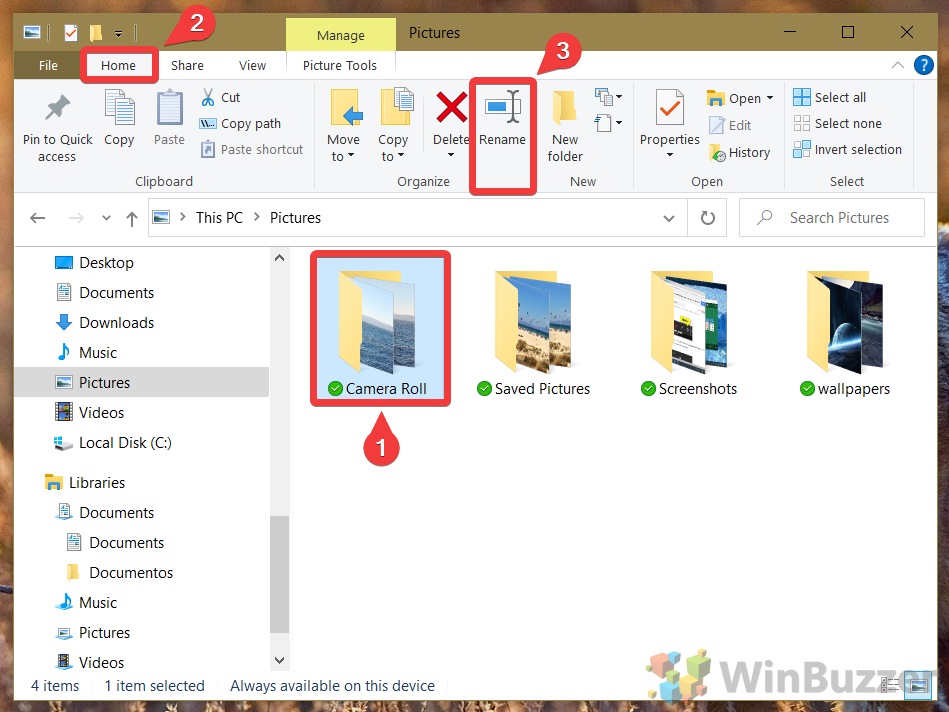
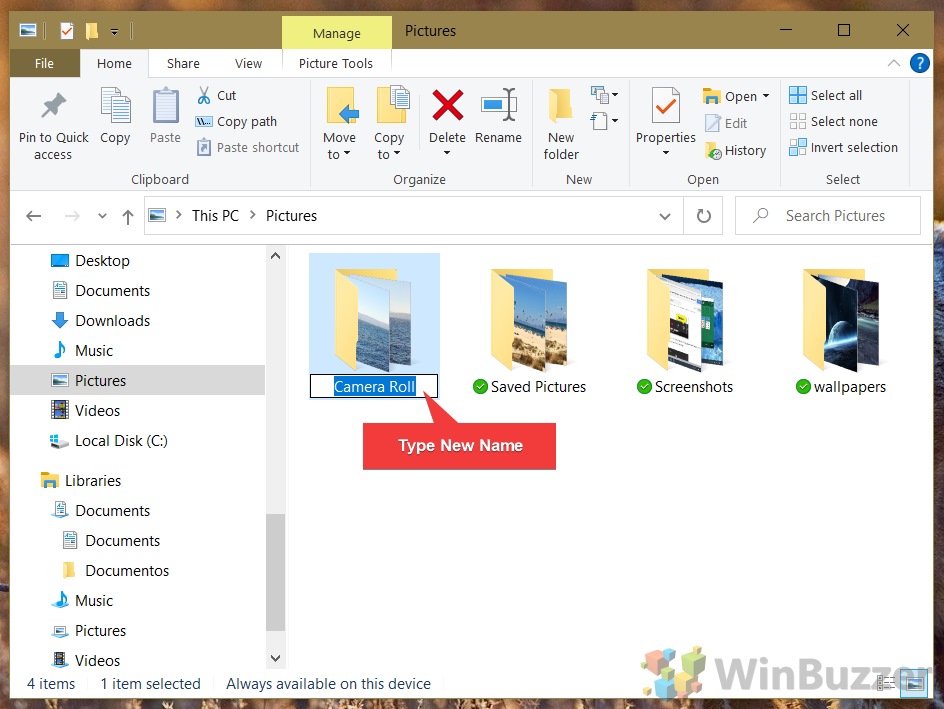
In the text box, type the name you’d like for your folder or file and press Enter.
If you don’t want to mess around with the ribbon or have it missing by default, you can rename files or folders with just a couple of left-clicks.
Click the file you want to rename, pause for a second, and then click on its text.
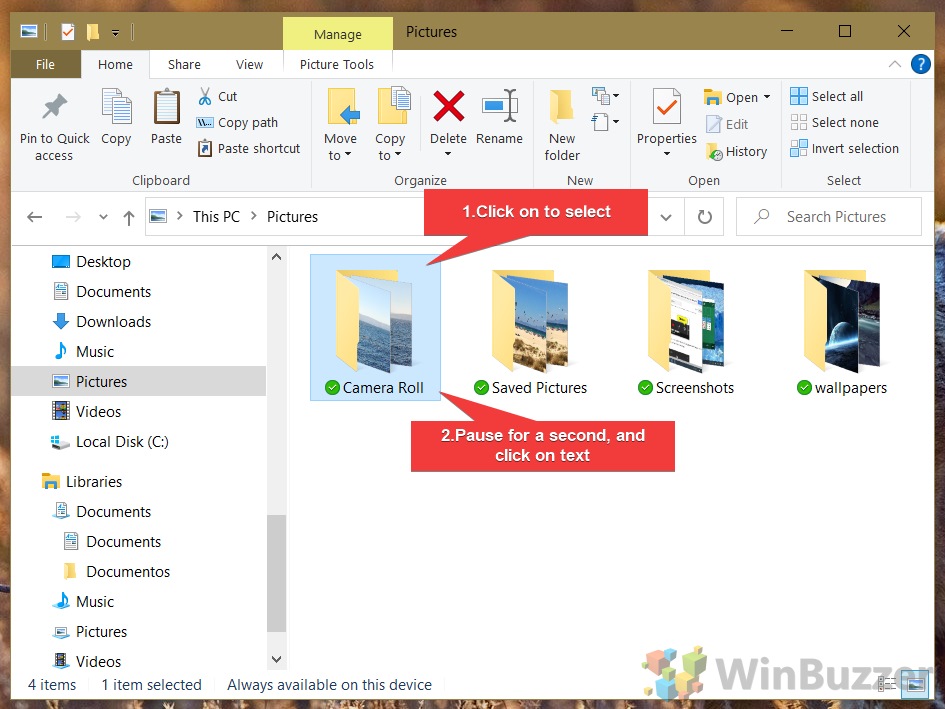
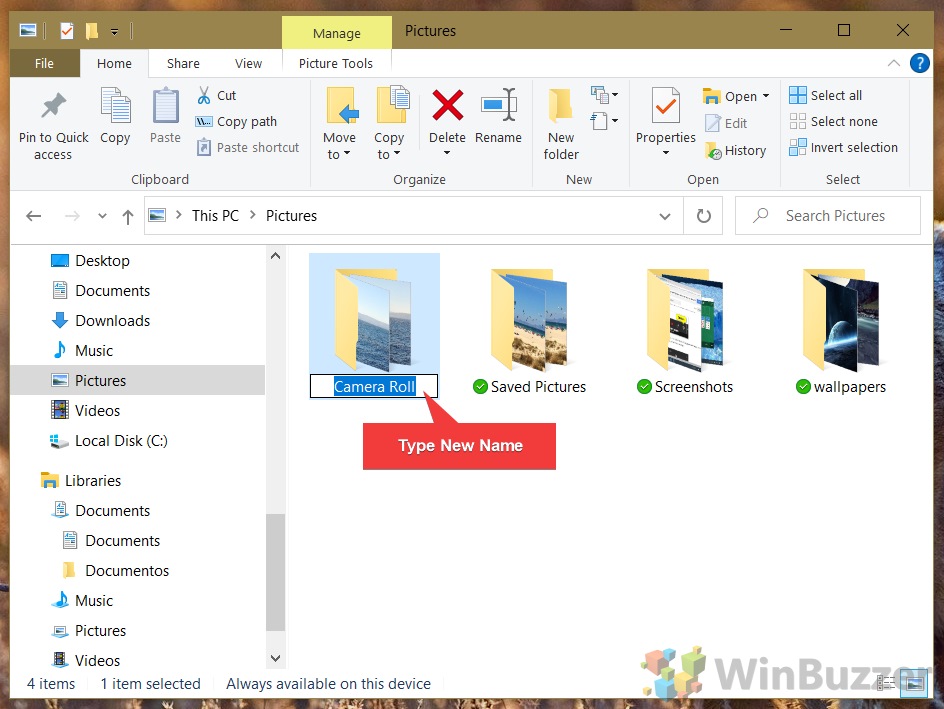
Don’t forget to press Enter or click away afterwards so the changes keep.
Of course, the tried and tested way to rename in Windows is via the context menu, which can be accessed via right-click.
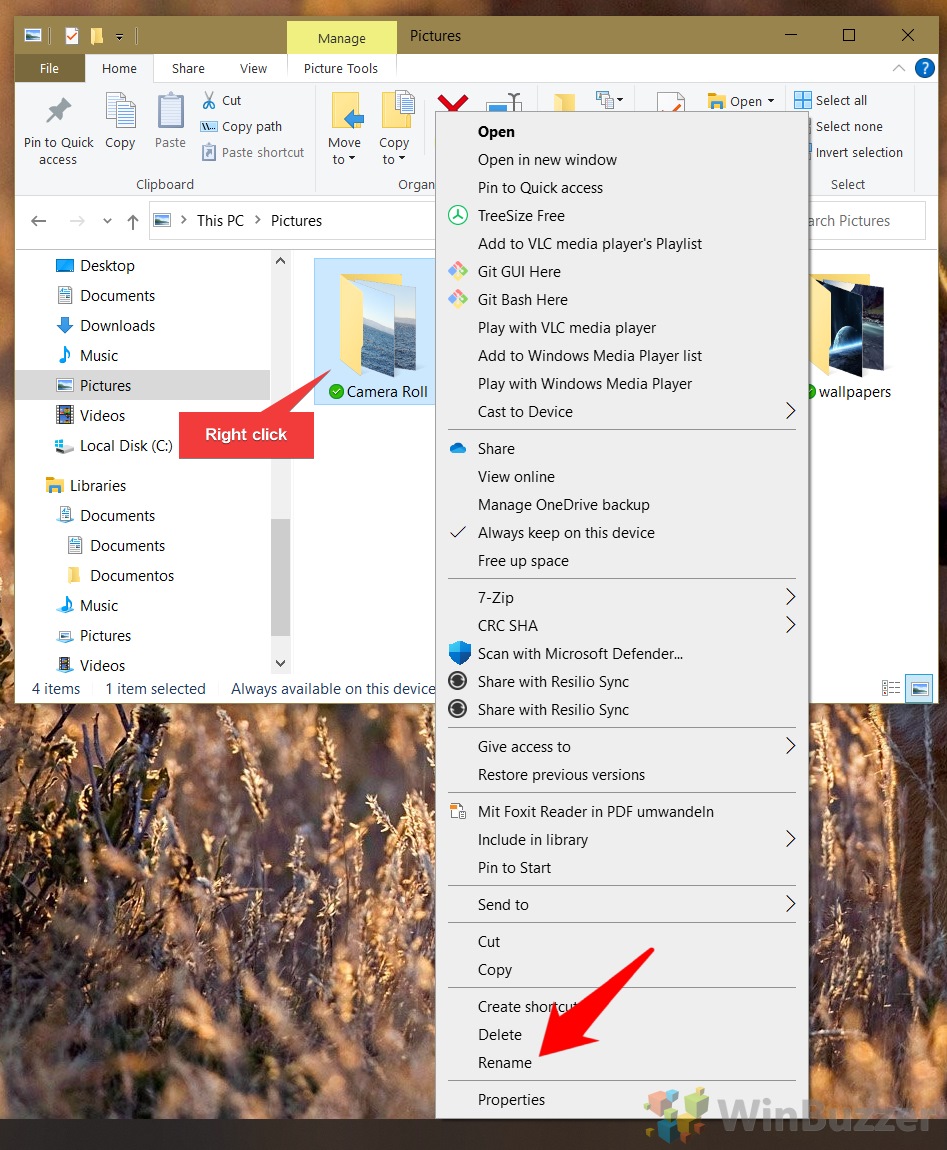
Once you’re done, click on any blank space to save the changes.
If for whatever reason you don’t like the other methods, you can also rename a file or folder via their properties menu. This works for any file you have the rights to change.
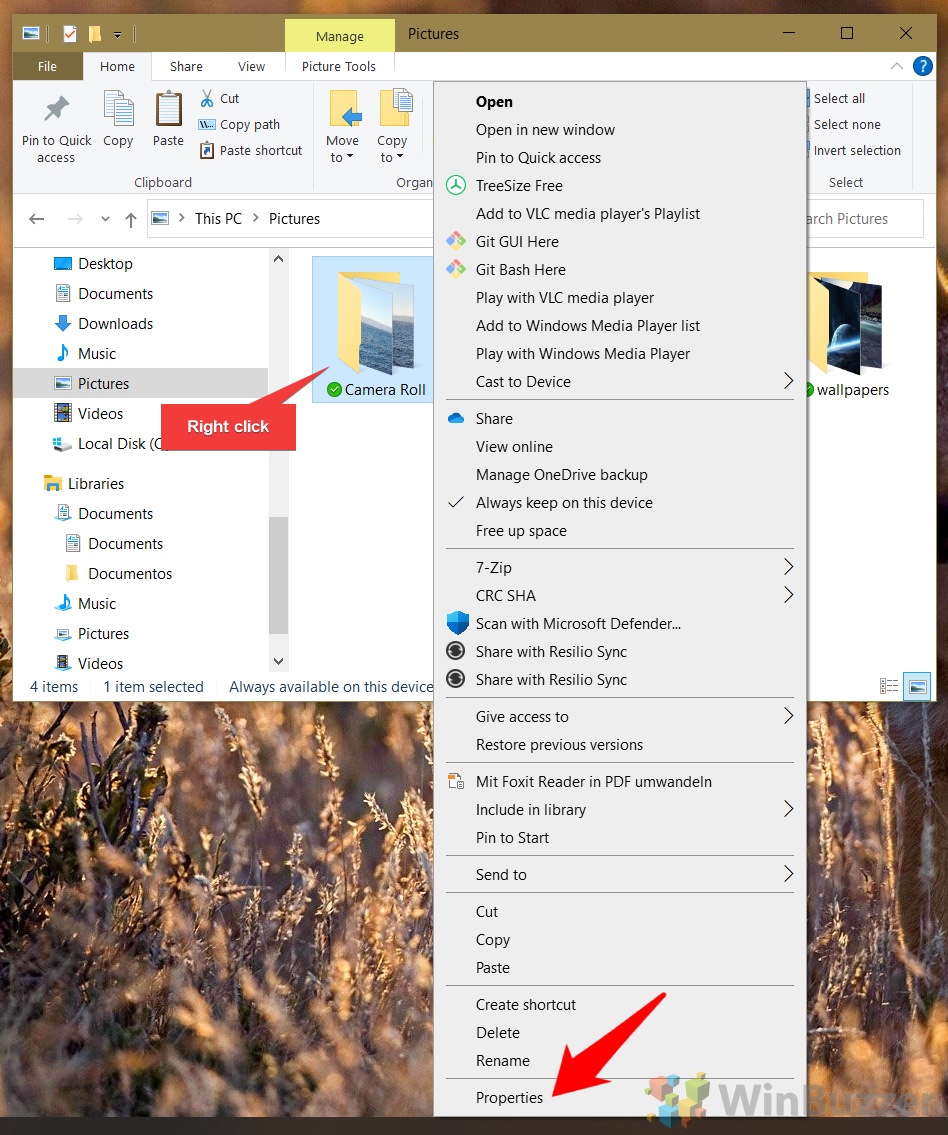
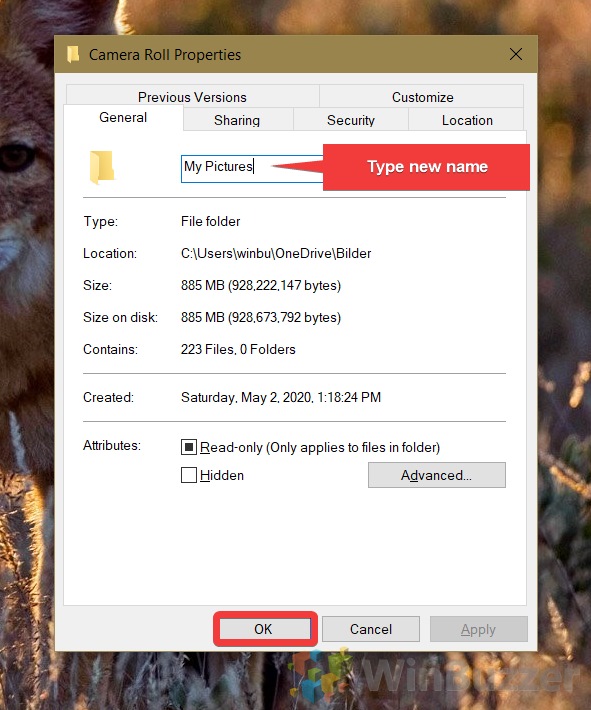
In the “General” tab, look for the file or folder’s name, next to its icon, and click in the text box. Type the new name, then click “OK”.
If you’re on a GUI-less Windows Server install or a file is being stubborn about permissions, PowerShell is your friend. Some additional research will also allow you to combine it with other commands, renaming and moving at the same time and more.
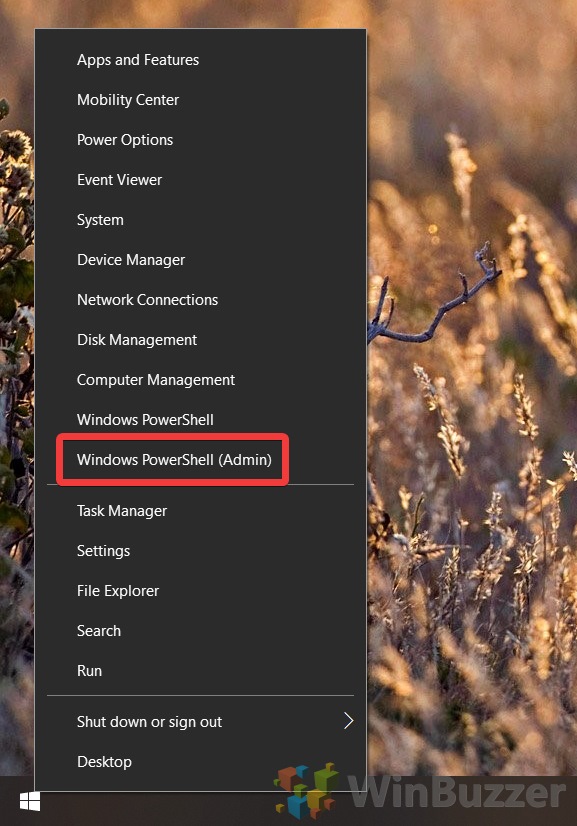
Press “Windows + X”, then click “Windows PowerShell (Admin)“.
In your PowerShell window, type the following command, being sure to replace y://our/path/to/file.txt with the location or your file, and UpdatedFileName with your desired name:
If you don’t like PowerShell, you can instead rename a folder in CMD via a rename command. You can also use CMD to rename files with this method:
To rename a folder in CMD, type the following, replacing y:\our\path\to\file.txt with the path to your file or folder and NewName with your desired name:
While renaming a single file or folder is intuitive enough, there are times when you need to mass rename files or folders in greater numbers. Doing so manually would be very time consuming, but thankfully Windows 10 lets you batch rename files straight from the File Explorer window.
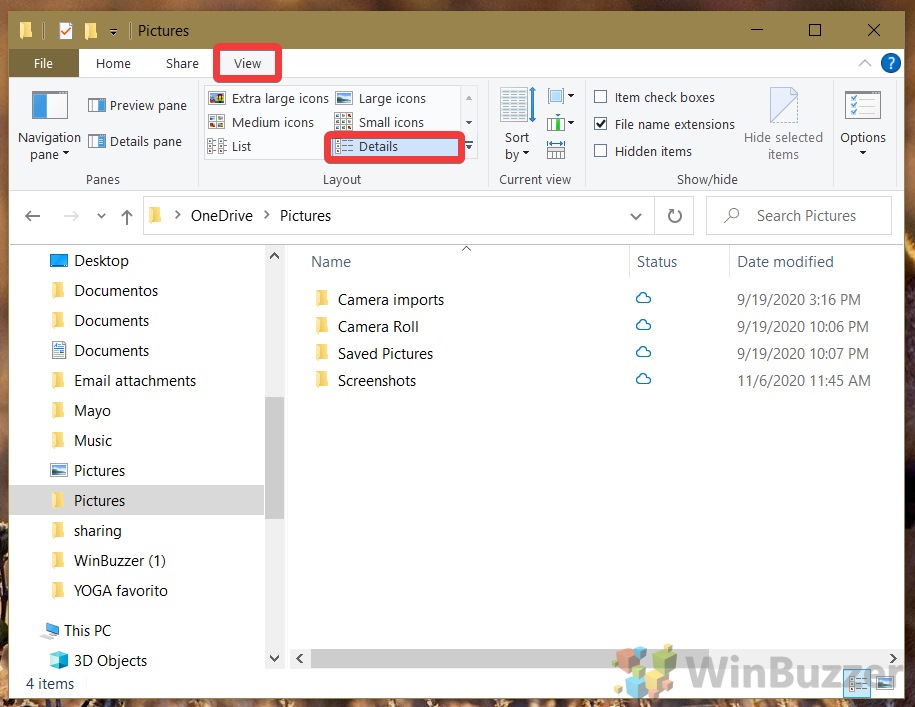
In your File Explorer window, select “View”, then “Details”.
Press “Home” in your ribbon and either press “Select all” in the top-right corner of File Explorer or Ctrl+click to choose the files you want to change. Press “Rename” to open the dialog box.
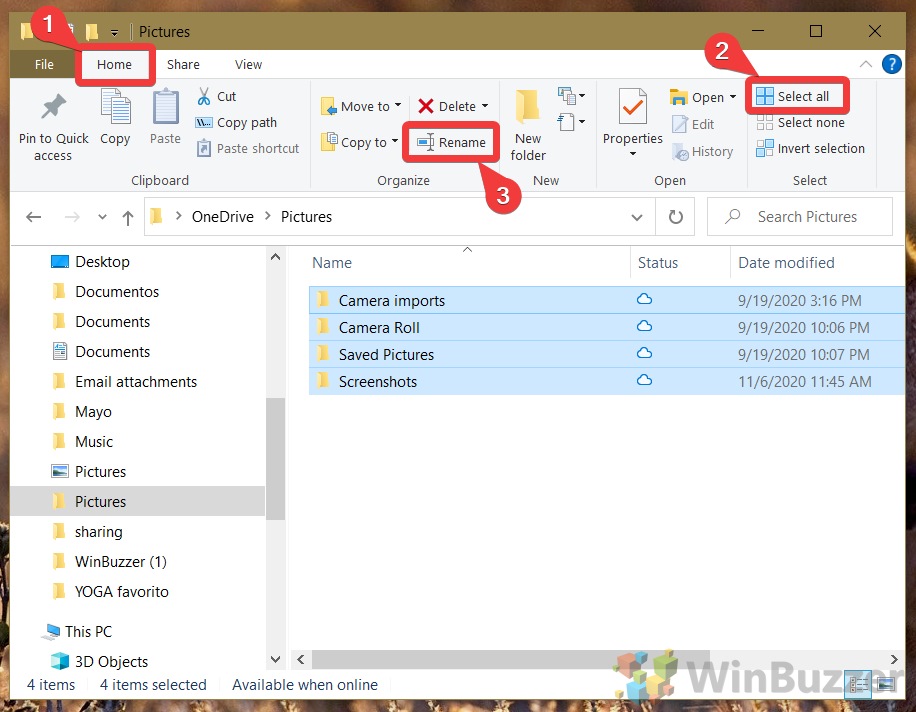
Windows will only open the text box of the first folder in the list, but that’s okay. Typing the text you’d like will also bulk rename the other folders you have selected. It uses the new naming structure to do so but adds a count to the end of each to differentiate them, such as My file and My file (2).

If you enjoyed this tutorial, you may also find our guides on how to enable the modern file explorer and disable the File Explorer preview helpful.
Let us know below if you have any questions or suggestions.
This content was originally published here.
Stay up-to-date with the latest tech tips, tricks, and news by exploring our recent blog posts! Whether you’re looking for computer cleaning guides, Windows 11 upgrade considerations, or other insightful tech topics, we’ve got you covered.
Understanding Cybersecurity: What It Is and Why It Matters Cybersecurity refers to the practices and processes designed to safeguard computers,...
Understanding the AI Revolution Artificial intelligence (AI) refers to the simulation of human intelligence processes by machines, particularly...
Understanding the Retirement of Windows 10 / Windows 10 end of life 2025 Microsoft's decision to retire Windows 10 marks a significant shift in the...
Understanding Computer Maintenance Computer maintenance refers to the systematic process of managing and preserving the functionality of computer...
Understanding Managed IT Services Managed IT services refer to the practice of outsourcing the responsibility for maintaining and anticipating the...
Understanding the IT Needs of Small Businesses Small businesses often encounter a unique set of information technology challenges that can...